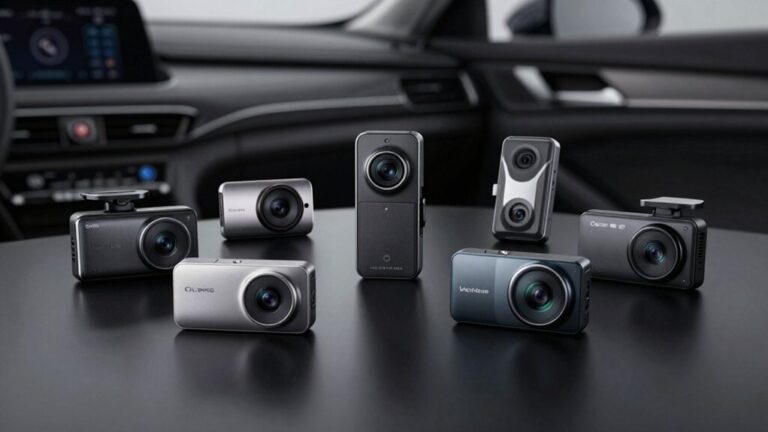
To connect your dash cam, first clean your windshield and mount the bracket near your rearview mirror within the wiper range. Route the power cable along your A-pillar trim and under the headliner using trim removal tools. Connect to either your vehicle’s 12V socket for basic operation or hardwire to your fuse box with a voltage cut-off kit for continuous parking mode recording. Test the camera’s boot-up sequence, adjust the viewing angle, and verify footage quality. The following sections cover advanced installation techniques and optimization strategies.
Understanding Your Power Connection Options
When connecting a dash cam to your car, you’ll encounter five primary power connection types, each offering distinct advantages for different recording scenarios. The plug-in method utilizes your 12V socket, providing power only during ignition-on operation. Hardwire kits tap directly into your vehicle’s fuse box, enabling continuous recording and parking mode functionality. Battery packs deliver independent power without draining your car’s battery. OBD-II cables draw power through the diagnostic port as an alternative to hardwiring. Power modules safely interface with your electrical system while incorporating battery protection features.
Installation considerations vary greatly across these methods. Plug-in connections require minimal technical expertise, while hardwiring and power module installations demand professional intervention to prevent electrical damage. Battery packs offer intermediate complexity, requiring proper cable matching for your specific dash cam model. Hardwiring creates a cleaner setup by eliminating messy cables from cigarette lighter or USB ports. Many hardwire kits include a voltage cut-off feature that prevents the dash cam from draining your vehicle’s battery while parked. To avoid compatibility issues, match hardwire kits to your specific dash cam brand for optimal performance and reliable power delivery. The hardwire connection typically uses a fuse tap to connect to an ACC fuse that provides power when the ignition is on. Regardless of your chosen power method, ensure your dash cam placement complies with mounting location laws that prohibit obstruction of the driver’s view. When routing cables, use adhesive clips or trim removal tools to conceal wires along the windshield edges and interior trim for a professional appearance.
Choosing the Right Mounting Location
Since your dash cam’s mounting location directly impacts footage quality and legal compliance, selecting the ideal position requires balancing visibility, camera performance, and regulatory constraints. For best placement, mount your camera center-front on the windshield, just below or behind the rearview mirror. This position minimizes driver obstruction while maximizing road coverage. If visibility concerns arise, position the unit slightly off-center toward the passenger side. Make sure the location falls within your windshield wiper range to maintain lens clarity during adverse weather. Dashboard mounting serves as an alternative where windshield placement violates regulations. When using dashboard mounts, tilt the lens upward to capture 60% road and 40% sky for proper exposure. For rear dash cams, mounting near the top center of the rear windshield provides a clear view behind without blocking visibility. Before attaching the mount, clean the mounting area thoroughly to ensure proper adhesion and prevent the camera from falling. Verify your chosen location complies with local laws and doesn’t interfere with airbags or safety sensors. Proper placement also ensures clear recording of important details like license plates and road signs.
Installing the Mounting Bracket
Proper mounting bracket installation requires meticulous surface preparation and precise hardware selection to guarantee long-term stability. Clean the windshield thoroughly and remove all protective films before proceeding. Select horizontal, flat surfaces free from black coatings or dot patterns. Secure the bracket using #10 fasteners or pop rivets through AMPS pattern holes—utilize all four mounting holes when possible.
Execute mounting techniques by lightly bending the arms to slide your dash cam into the serrated tooth interface. Position the bracket close to the windshield to minimize glare. Perform bracket adjustments by loosely tightening screws initially, allowing vertical movement and rotation for ideal camera angles. Confirm the camera orientation is vertical and level, then tighten screws to maximum 1 N·m torque to prevent damage. After installation, perform periodic checks of mount stability to ensure the bracket remains secure and functional over time. When selecting your mounting location, position the camera behind the rear-view mirror to achieve optimal coverage while maintaining an unobstructed driver’s view. Consider using an adhesive mount for a more permanent, low-profile installation that reduces vibration and creates a cleaner appearance. For enhanced functionality, look for models with cloud connectivity that enable remote access to footage and real-time monitoring capabilities from your mobile device. Advanced mirror dash cam systems offer three-channel recording with front, rear, and interior cameras to provide comprehensive vehicle surveillance and security coverage. Many modern dash cams include parking mode features that continue monitoring your vehicle even when the ignition is off, providing 24/7 security protection.
Routing and Concealing Power Cables
After securing the mounting bracket, cable concealment becomes critical for maintaining both vehicle aesthetics and electrical integrity. Proper cable management begins by routing wires along the A-pillar trim and beneath the headliner, carefully avoiding airbag deployment zones. Use trim removal tools to gently lift panels without damaging clips, then tuck cables behind rubber seals around doors and windows.
Secure routing paths with automotive-grade cable ties and adhesive-backed holders, preventing movement during vehicle operation. When hardwiring to the fuse box, route cables discreetly under the dashboard and behind panels. Guarantee concealment techniques avoid steering columns, pedals, and heat sources like HVAC ducts.
Connect ground wires to clean, unpainted metal chassis surfaces. Manage excess cable length with clips to prevent sagging, maintaining a professional installation that won’t interfere with vehicle controls or driver visibility. Before mounting, clean the installation area thoroughly with an appropriate cleaning solution to ensure the adhesive film or suction cup adheres properly to the windshield surface. Modern dash cams with touchscreen controls simplify the adjustment process once installation is complete, allowing you to verify proper camera angles and settings. Whether you’ve chosen a single-channel dash cam or a more comprehensive multi-camera system, proper cable routing ensures clean integration with your vehicle’s interior. While improper aftermarket wiring can affect warranty coverage, using low voltage cutoffs and proper installation practices minimize the risk of electrical faults that could lead to warranty claims. Ensure safe routing of cables to avoid any interference with the driver’s line of sight while operating the vehicle. Neatly concealed cables also make it easier to use manufacturer apps for live viewing and adjusting settings on your dash cam.
Connecting to Your Vehicle’s Power Source
Your dash cam requires a stable power connection to function reliably, and you’ll find four primary methods for tapping into your vehicle’s electrical system: hardwiring through the fuse box, utilizing the OBD-II diagnostic port, connecting via the 12V cigarette lighter socket, or installing a dedicated battery pack.
The fuse box method provides the most professional installation. Locate your vehicle’s interior fuse box under the dashboard, then identify ACC and constant power circuits using your owner’s manual and multimeter. Fuse tap kits enable safe piggybacking—insert the original fuse into the tap, connect red wire to ACC for ignition-switched power supply, and yellow to constant power for parking mode functionality. To prevent battery depletion when using parking mode, consider hardwiring kits with low voltage protection that automatically shut off the dash cam before your battery reaches critical levels.
The OBD-II port offers plug-and-play simplicity without electrical modifications, while the 12V socket provides basic power during ignition-on operation only. The OBD-II solution preserves your 12V socket for other devices like phone chargers while maintaining a clean installation. Most dash cams consume between 4-10 watts depending on features, with 4K models typically drawing around 10 watts during active recording. For multi-camera setups, the front camera powers the rear camera via a dedicated wire, simplifying the wiring process for two-channel systems. Once powered and recording, the dash cam’s built-in G-sensor will automatically detect collisions and lock critical footage to prevent overwriting. If you prefer a wireless solution, dash cam apps can turn your smartphone into a recording device with features like collision detection and cloud storage.
Testing Camera Function and Adjusting the View
Once you’ve established the power connection, confirm your dash cam’s operational status by checking the LED indicator lights and LCD display for proper boot-up sequences. Review recent footage to verify the device captures clear images and sound effectively. For thorough functionality evaluation, conduct a test drive under various lighting conditions to assess recording performance and identify any latencies or interruptions.
Proper angle adjustment is essential for ideal coverage. Position forward-facing cameras to capture road conditions without interior obstructions blocking the view. For inward-facing units, align the driver’s face within the green oval template area shown in reference diagrams. If your dash cam includes interior recording capabilities, adjust the cabin-facing camera to capture the vehicle’s interior without glare or blind spots, which is particularly valuable for rideshare drivers or comprehensive security monitoring. Models with dual-lens design can record both road and cabin views simultaneously, providing complete coverage for rideshare and security applications. Take test pictures from multiple angles, repeating adjustments until positioning meets AI Event Detection requirements and guarantees unobstructed visibility across all scenarios. If you have a dual dash cam system, ensure both the front and rear cameras are properly aligned to record simultaneously for comprehensive coverage. Ensuring your footage captures sufficient detail is particularly important since dash cam footage can be used in court when documenting traffic incidents or accidents. Since image clarity serves as a key selling point for dash cams, ensuring your camera produces sharp, detailed footage is crucial for maximizing the device’s value and effectiveness. Properly configured dash cams with dual-facing cameras are especially effective for fleet managers and rideshare drivers who want to monitor both road hazards and driver behavior for enhanced safety and accountability.
Setting Up a Rear Camera
Installing a rear camera requires careful planning to achieve ideal visibility and seamless integration with your dash cam system. Position the camera above the license plate area for unobstructed coverage, utilizing best angles that eliminate blind spots. Secure the unit with provided mounting hardware, drilling precision holes for screws and wire pass-through.
Route the video cable and power wires through interior trim panels, headliners, and rubber grommets to the front dashboard. Tap into the reverse light circuit by splicing the camera’s power wire to the positive reverse light wire, ensuring activation only when reversing. Use a multimeter to verify the reverse light wire by checking for approximately 11-12v voltage when the vehicle is in reverse. Connect the ground wire to a suitable chassis point.
Link the video cable to your head unit’s designated input, enabling camera features through the reverse trigger wire for automatic display switching. When choosing a rear camera for your hard-wired dash cam setup, prioritize models with superior low-light performance to ensure clear footage in dim parking conditions or nighttime driving. Consider dash cams with 24-hour parking monitoring capabilities to provide continuous surveillance even when your vehicle is parked and unattended. Dash cams equipped with supercapacitors instead of batteries offer greater heat resistance and reliability in extreme vehicle temperatures, making them ideal for rear camera installations exposed to direct sunlight.
Running Cables for Dual-Channel Systems
With your rear camera mounted and connected, dual-channel systems require strategic cable routing from both camera locations to a centralized power source at the fuse box. Plan your cable pathways before installation begins—the front camera wire runs between windshield and headliner, while the rear cable follows the roof edge to the B-pillar on the passenger side. Use plastic trim removal tools to access A-pillar and B-pillar areas without damaging airbag systems. Secure cables with zip ties and adhesive clips along dashboard surfaces and windshield edges. For installation tips, route wires through door sills and utilize headliner space for primary concealment. Connect the front camera’s red wire to an ACC fuse tap and the rear’s yellow wire to a VCC tap, ensuring original fuses rate between 10A-30A. Consider adding a capacitor to your dash cam circuit to maintain power during engine cranking, preventing shutdown when the ignition momentarily cuts power to auxiliary feeds.
Final System Check and Optimization
Completing your dual-channel dash cam installation requires systematic verification of all components to guarantee peak performance and reliability. Begin your final system check by conducting test recordings under various driving scenarios—different times of day, traffic conditions, and weather patterns. Review footage for sharpness, clarity, color accuracy, and proper timestamps. Verify night vision capabilities and infrared performance in low-light environments. Test motion detection sensitivity and parking mode activation to reduce false alerts while conserving storage.
Apply enhancement techniques by updating firmware to access performance improvements and security patches. Configure resolution, frame rate, and loop recording settings to balance quality with storage capacity. Format high-speed memory cards (Class 10, UHS-I) regularly to prevent file corruption. Inspect mount stability and camera angles using dashboard tools, ensuring unobstructed views and minimal distortion for sustained peak operation. Evaluate frame rate consistency across different driving speeds to ensure smooth visual output during high-speed scenarios.